Petalinux (two) open petalinux kernel debugging mode
description
To debug Linux kernel modules based on the Xilinx SDK, you must enable KERNEL_DEBUG_INFO and KERNEL_DEBUGGING. This blog post comprehensively documents how it is handled in Petalinux.
solution
Obtaining petalinux based on debug mode requires some specific configuration settings.
There are some specific configurations that need to be set up in order to get PetaLinux based kernel debugging work.
Please refer to the help file for complete configuration steps:
SDK Help > Xilinx Software Development Kit (SDK) User Guide > Working with Xilinx System Debugger > System Debugger Supported Design Flows > Attach and Debug using Xilinx System Debugger.

Here are the steps involved in configuring the PeaLinux-based Linux kernel debug mode:
1) Create a Zynq Vivado and export template project hardware SDK.
2) Create a Linux application in the SDK Hello World example and close the SDK project to continue with the Petalinux project.
3) Create a petalinux project with the following command:
Petalinux-create --type project --template --name
4) Go to the petalinux project directory and run the following command:
Petalinux-config --get-hw-descripTIon=
Specify the hw-descripTIon directory, which contains the hdf file (<project_name>. The sdk directory creates the Vivado project before you).

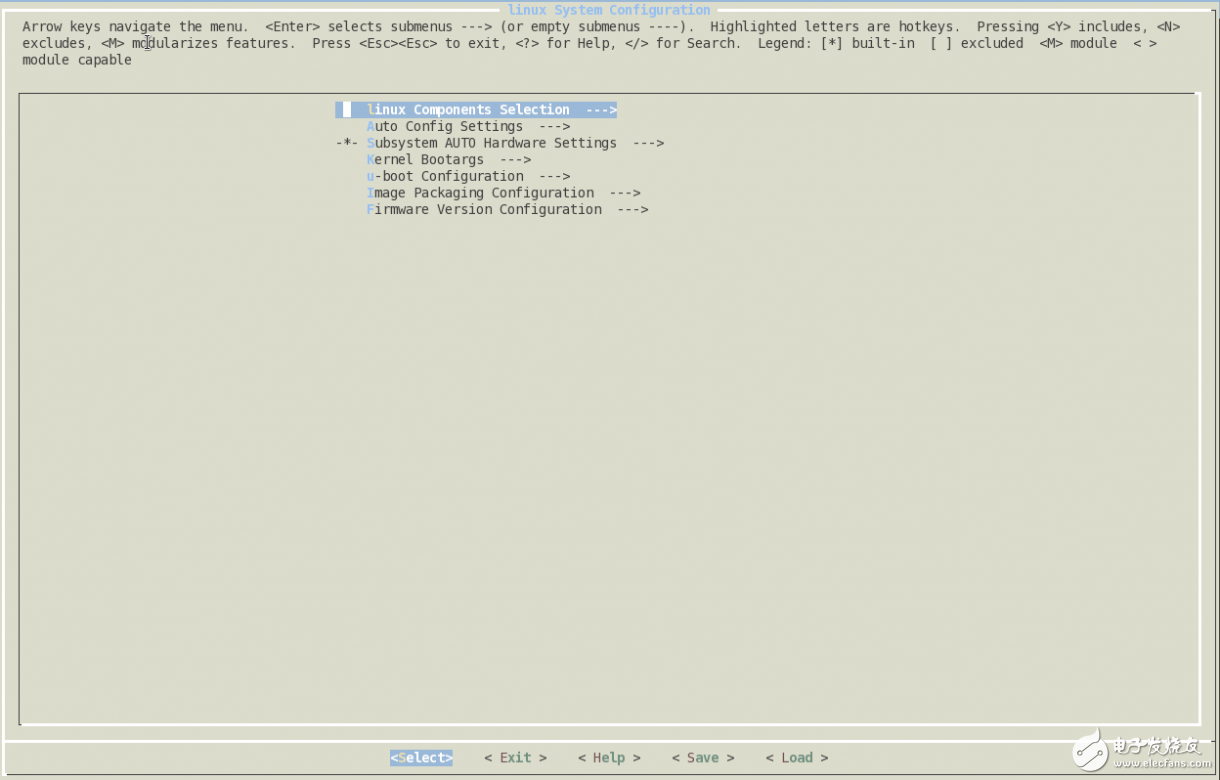
Figure 1 Petalinux menuconfig view opened by the petalinux-config command
5) As shown in Figure 2, reach the Linux Components SelecTIon ---> and then to kernel (xlnx-4.0) items, select the remote option:

figure 2
6) Next we need to specify the path to the full kernel source code, which can be found on the Xilinx GitHub page.
7) Locate the Remote linux-kernel setTIngs ---> Remote linux-kernel git URL subkey, copy the following link and paste it into the text box shown in Figure 3:
https://github.com/Xilinx/linux-xlnx

image 3
To debug the kernel, we need the full xlnx-linux source code. Select remote source, in the configuration phase of the petalinux project, the kernel image will be automatically downloaded from GitHub to the PetaLinux project.
8) Next, you need to set the load address offset of the boot image file. As shown in the figure below, locate u-boot Configuration ---> and set the netboot offset, and set the boot offset of boot to 0 x04000000. For more information, please refer to (Xilinx Answer 59853)
Note: After entering Debug mode, the compiled image file will become larger, and the size is set larger to avoid temporary boot area overflow.

Figure 4
9) After petalinux-config is completed, save and exit.
10) Next to the kernel configuration:
As mentioned in the SDK help for the PetaLinux tool, set the following options:
CONFIG_DEBUG_KERNEL = y
CONFIG_DEBUG_INFO = y
To do this: Run petalinux-config -c kernel to open the kernel configuration interface:

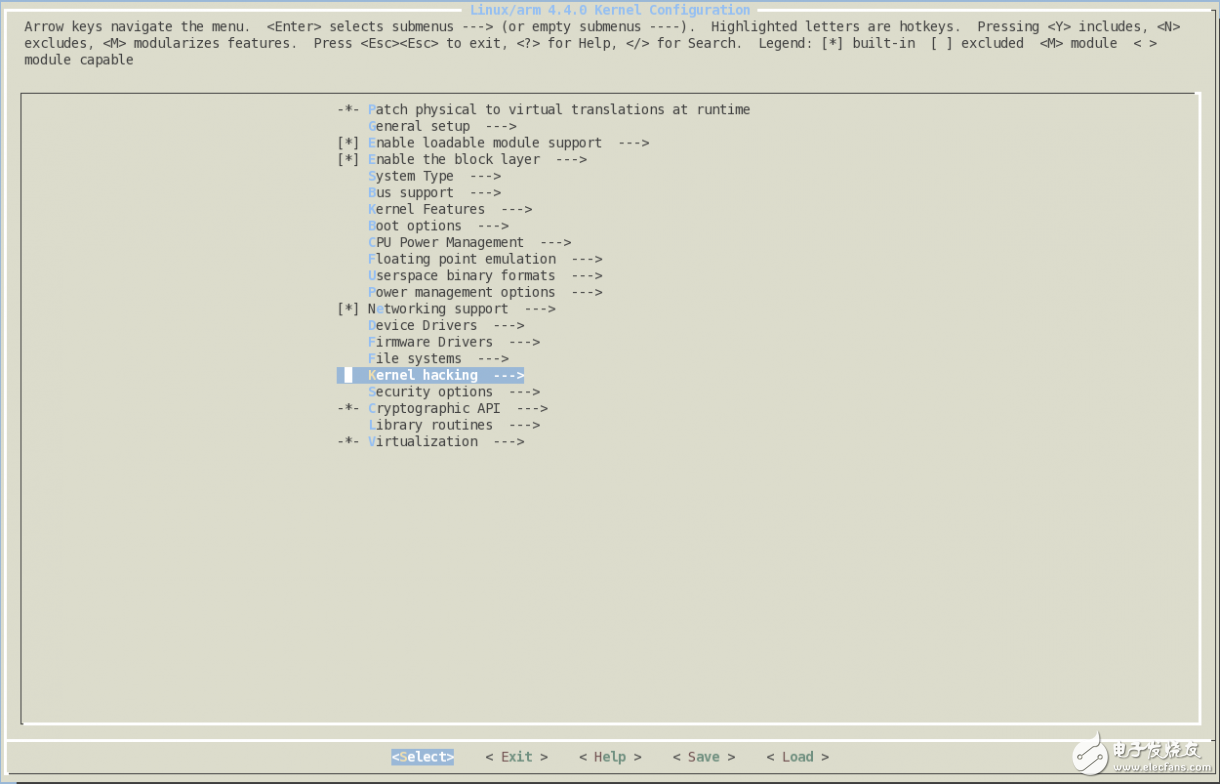
Figure 5 selects the Kernel Hacking item kernel configuration panel
11) Locate Kernel Hacking ---> Kernel Debugging, as shown in Figure 6, select this item:

Figure 6 Enable kernel debugging mode configuration interface
12) Next, locate the Compile-time checks and compiler options ---> Compile the kernel with debug info.

Figure 7 Enable DEBUG_INFO
13) Save and exit the kernel configuration.
14) Next, you need to turn on the TCF agent service, which is activated on the target board's Linux kernel and provides us with hardware access services during kernel debugging.
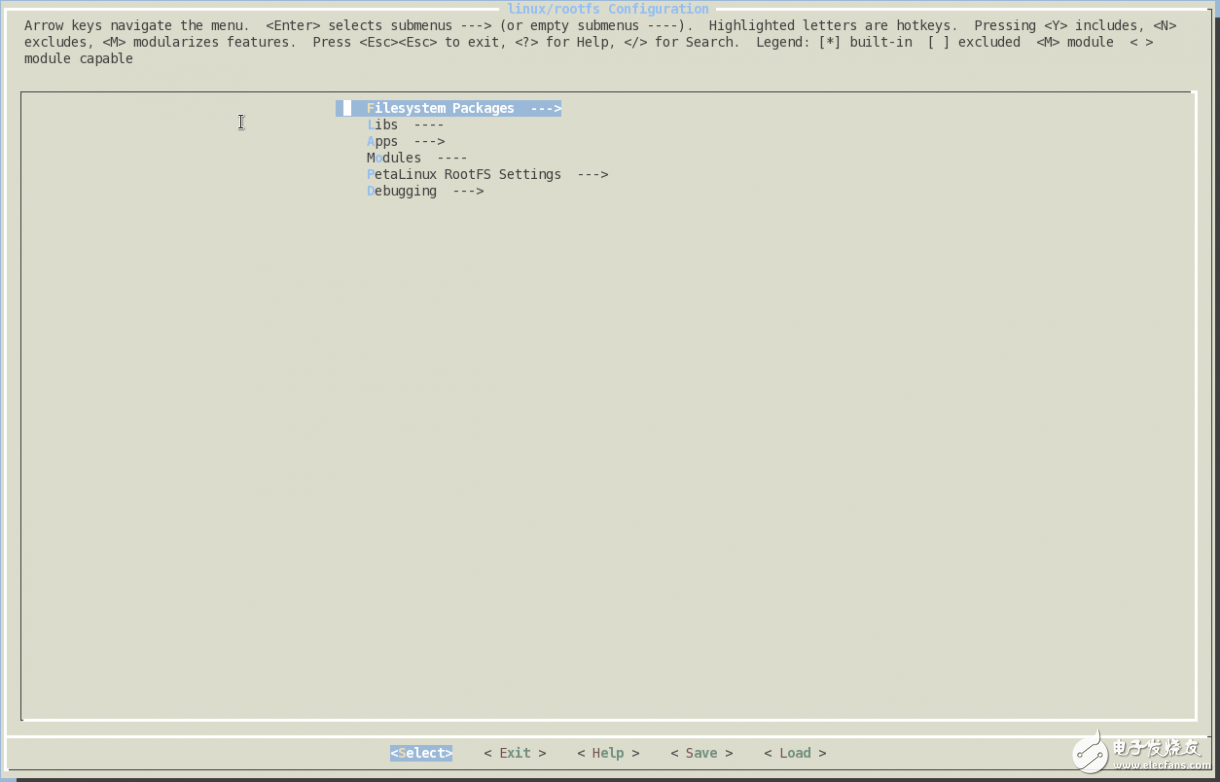
15) In the petalinux project directory, run petalinux-config - c rootfs. You will see the following dialog:

Figure 8
16) Navigate to Debugging ---> build debugable applications to enable the item.
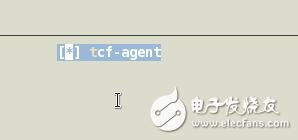
Then navigate to Filesystem Packages ---> base --->tcf-agent and enable the item
[*]tcf-agent

Figure 9
17) Save and exit the root file configuration menu.
After saving and closing the file. All kernel debugging settings are complete. For more information, please refer to (Xilinx Answer 61332)
18) Finally, to the PetaLinux project root directory, petalinux-build builds the PetaLinux project, uses the following command, builds BOOT.bin based on zynq_fsbl.elf, and the generated files are stored in the images/linux directory:
Petalinux-package --boot --fsbl --fpga --u-boot < U-boot.elf>
19) Next, follow the SDK Kernel Debugging section to start kernel debugging.
Floor Standing Display,Signage Advertising Display,Advertising Lcd Screen,Standing Digital Signage
APIO ELECTRONIC CO.,LTD , https://www.displayapio.com
