The original inventor does not depend on the network disk to build their own 256TB network disk - Nextcloud build process
The days of network disk in 2016 were not good. One family over the Baidu cloud has already had an early speed limit. Privacy issues are also often exposed.
Since now the network disk is not fly, then build a Nextcloud myself ~ ~ ~ He can upload can be downloaded (not nonsense) can share a bunch of plug-in key people open source
I myself have built an Alibaba cloud at the end of the year to use a virtual machine to demonstrate the build process.
First calculate the next price Alibaba Cloud and Tencent Cloud two in the country is still more reliable because it is only to build a network disk configuration Well 1G 1 nuclear enough to the bandwidth is relatively pitiful the server is to see the upload speed of 1Mbps is necessary 20 yuan / month 2Mbps will be 40 yuan / month student party, where come so much money ah. But you can charge by the amount!

So even if 100Mbps is a price of 0.8 yuan / G because this network disk I use it so it is of course, the amount of money to the cost of it anyway, not to use 10G a month more than the bandwidth to pay more. 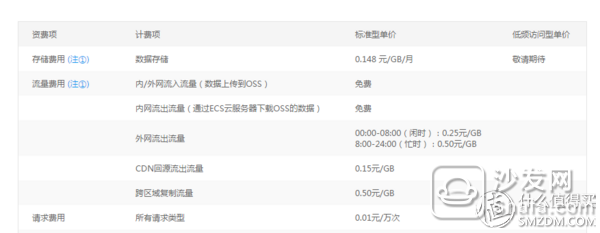 Since it is a disk drive, of course, to store data, Alibaba Cloud's cloud drive is not worth it. Then use OSS å‘— 256TB capacity for flexible charges. Same with regional OSS and ECS. Intranet does not charge, only charge capacity, 1G. 0.148/yuan/month, how much to use as far as the mounting method Well I will explain the article at the end.
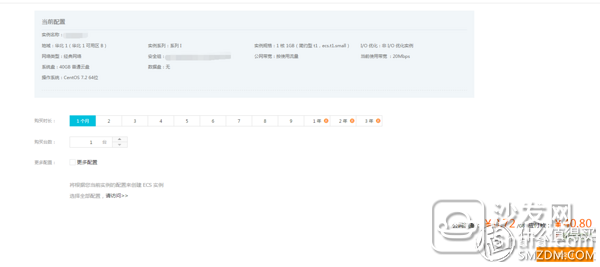
In this way, the rest of the 40 yuan each month is based on the amount of money, less data, the students also less than 10 yuan / month, forget about their own home to build 50 yuan with electricity is not enough
Pull awayReturn to the topic! First of all, we bought the cloud host system of course, choose centos7.2 Do not ask me why not Windows. You see that server uses Windows
Rest assured that my tutorial white can also teach you
Then we installed the Xshell 5 remote connection server software on the computer and opened it
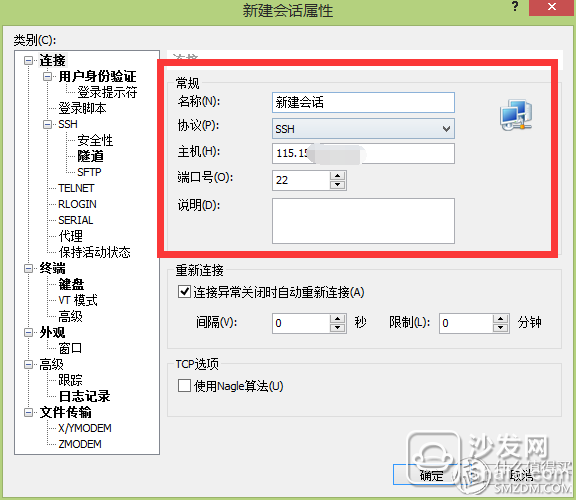
Host site fill in your server external network IP address and press confirm
User name input root password Well I do not know ah
This connects you on behalf of you
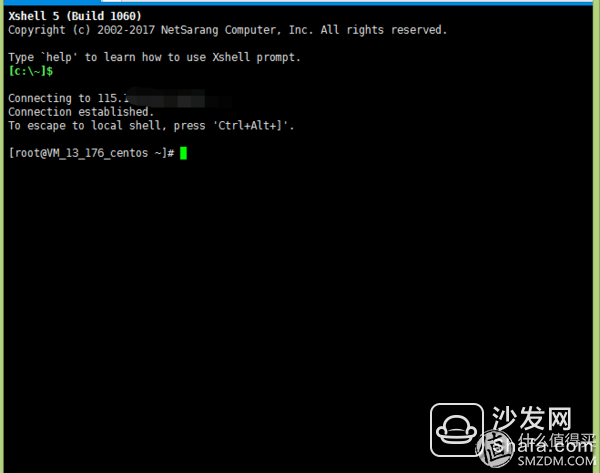
Then enter the command with me. First we have to install an Apache server
# yum install httpd
Press Enter
He asked if you want to continue to perform. Of course, if you choose y, enter Y, and press Enter, the steps are all the same.
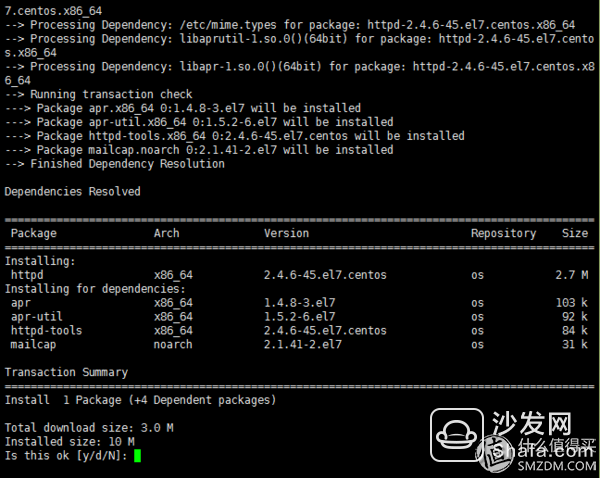
# systemctl start httpd and enter it to start the Apache service
Enter your server's external IP in the browser address bar. Can you see this interface?
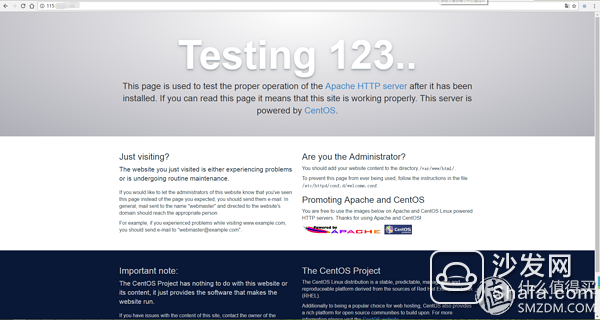
Congratulations on your web server.
If you can not access after you enter ip it is because of the firewall's sake, the solution below
Method 1: Close
Temporarily closed: # systemctl stop firewalld
Permanently closed: # chkconfig firewalld off
Method 2: Open the 80/tcp port
# firewall-cmd –zone=public –add-port=80/tcp –permanent refresh the browser, you can see the page and prove it successful
Next install PHP nextcloud is a PHP-based web application
In order to facilitate the replacement of the downloaded source
# yum install http://repo.webtatic.com/yum/el7/x86_64/RPMS/webtatic-release-7-3.noarch.rpm
# rpm -Uvh https://mirror.webtatic.com/yum/el7/webtatic-release.rpm
Then install PHP7.0
# yum install php70w
Enter after loading
# php -v You can see that the PHP version proved successful

Then we install the database, the database of course use Mysql
# yum install mariadb-server.x86_64
# systemctl start mariadb
Now that the basic environment is set up, you can install nextcloud.
First --- install phpMyAdmin to manage the database
Official website: http://
Download address: https://files.phpmyadmin.net/phpMyAdmin/4.6.3/phpMyAdmin-4.6.3-all-languages.zip
Upload package to server I use FIleZilla software here
Open FileZilla, click on "File -" Site Manager -" New Site and enter inside your external network IP port is 22 protocol is SFTP account is root password is your root password Click Connect
Then put the downloaded ZIP file under the /var/ folder
Then enter in Xshell
# cd /var/
# unzip phpMyAdmin-4.6.3-all-languages.zip
# yum install php70w-mbstring php70w-mysql
# systemctl restart httpd
Unzip and then enter your IP/phpMyAdmin in the browser address bar
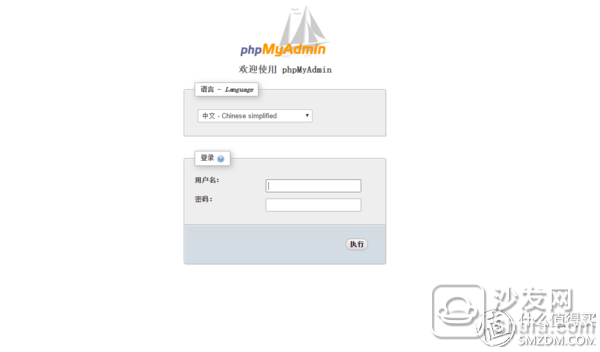
Return to Xshell because the database has no root account can not use input
# mysqladmin -u root password 'your password'
The root password is set back to the browser user name is the root password is the above your own password to change
Click on the database to create a new nextcloud database
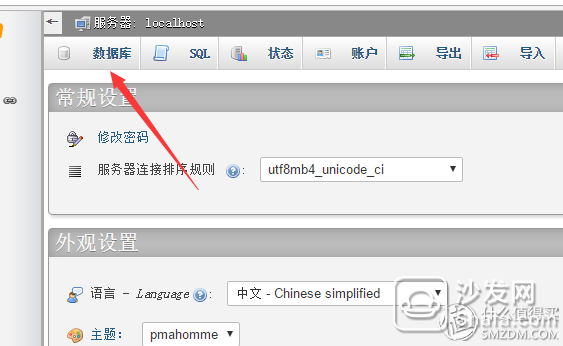

Then click on the second SQL
enter
CREATE USER 'username'@'localhost' IDENTIFIED BY 'set own password'
Select the account to select the user name you just created and write permissions
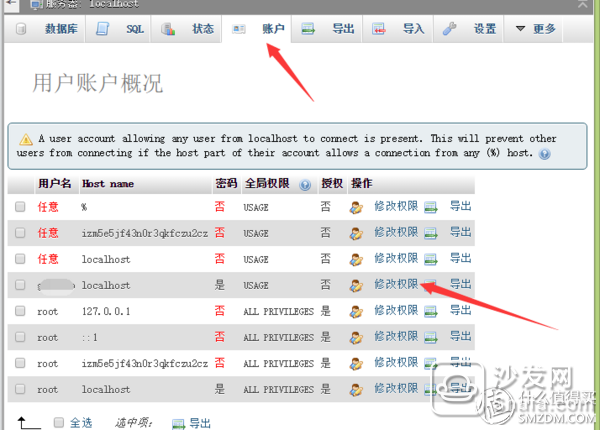
Click on the database above
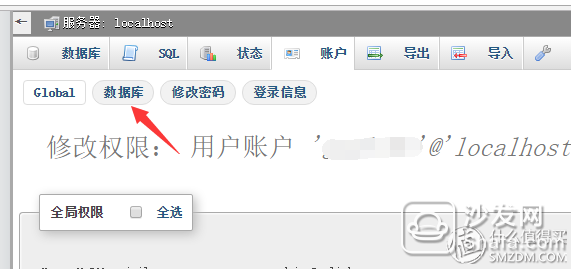
Select the newly created next cloud click execution and then select all the permissions and then execute OK
In this way, the database is established here. Then we will install nextcloud.
Also go to the official website to download nextcloud
Http://Download the latest version
Also uploaded to /var/
Also unzip it out
Then enter your IP/nextcloud into the address bar
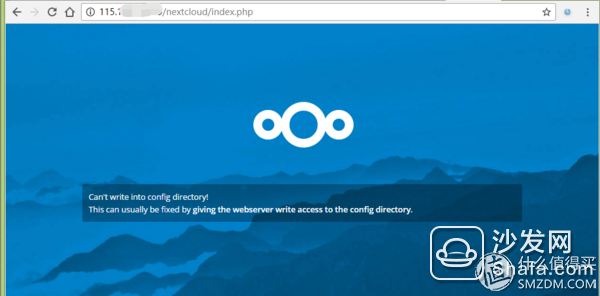
This shows that you did not give the nextcloud directory permission
# cd /var/
# chown apache nextcloud -Rf
# chmod 770 nextcloud -Rf
Refresh the browser appears
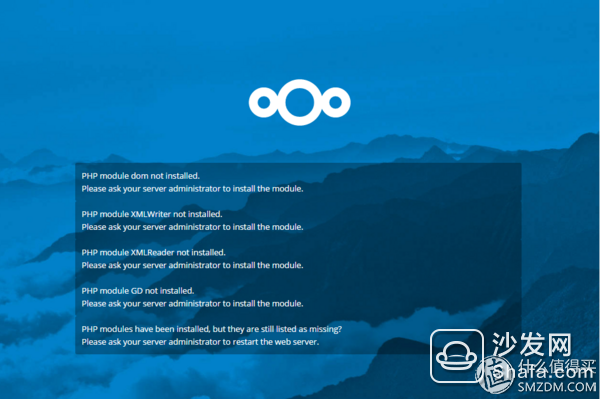
Okay, what is the lack of missing runtime libraries?
# yum install php70w-dom php70w-gd
# systemctl restart httpd
Then a browser refresh miracle appeared

Click Store & Database

User name password is set by yourself
The data directory is where you store the data. If you mount the OSS, select the OSS directory location.
Database select Mysql
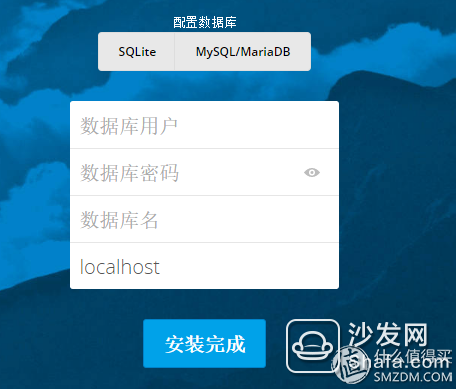
The database user password is the username and password entered here CREATE USER 'username'@'localhost' IDENTIFIED BY 'set own password'
The database name is the newly created next cloud database
Click to finish installing

Congratulations on everyone's installation
The method to modify the upload size limit is
# vi /etc/httpd/conf/httpd.conf
Find the following fields
Change AllowOverride None to AllowOverride All
Esc
:wq Save Exit
# cd /var/
# chown apache .htaccess
You can now modify the upload limit

Last OSS tutorial
Install ossfs software Alibaba Cloud official software to see Ali cloud help documentation
Set the bucket name and AccessKeyId/Secret information and store it in the /etc/passwd-ossfs file. Note that the permissions of this file must be set correctly. The recommended value is 640.
Echo my-bucket:my-access-key-id:my-access-key-secret > /etc/passwd-ossfs
Cat /etc/passwd-ossfs
Chmod 640 /etc/passwd-ossfs
Mount directory to be empty
Ossfs my-bucket /data/ -ourl=oss-cn-qingdao-internal.aliyuncs.com -ouid=1001 -ogid=1001 -oumask=007 -o allow_other
Ouid and ogid are the user IDs of the Apache server
User ID view
Cat /etc/passwd
Cd to owncloud directory ll check the data directory user corresponds to the above query results
Df -h view mount
Then install nextcloud
Automatic mounting
Cd /etc/init.d/
Create new ossfs file and write information
#! /bin/bash
#
# ossfs Automount Aliyun OSS Bucket in the specified direcotry.
#
# chkconfig: 2345 90 10
# description: Activates/Deactivates ossfs configured to start at boot time.
Ossfs my-bucket /data/ -ourl=oss-cn-qingdao-internal.aliyuncs.com -ouid=1001 -ogid=1001 -oumask=007 -o allow_other
Save and exit
Execute the command: chmod a+x /etc/init.d/ossfs
Put the newly created ossfs script with executable permissions.
Execute the command: chkconfig ossfs on
After mounting, you can see
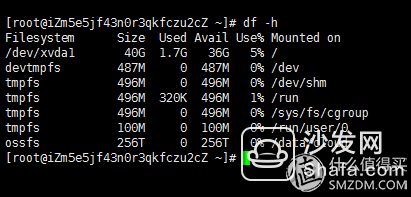
256TB of OSS elastic space mounts in
gaming headset
gaming headset
Shenzhen Linx Technology Co., Ltd. , https://www.linxheadphone.com
